
Using the Leads Tab
Everything a visitor does on your website feeds into the Leads tab: the lead record itself, the searches saved for them, the properties they save, the forms they submit, and the comments they leave on listings. This article covers each section of the Leads menu, in order.
What is in the Leads menu
-
Lead Dashboard — See every lead in the account, open a lead record, and create saved searches for that lead.
-
Stages — Create and edit the pipeline stages you assign to leads.
-
Saved Searches — See every saved search in the account, then edit, copy, or delete it.
-
Saved Properties — See which properties leads have saved and when.
-
Form Inquiries — See tour requests, showing requests, and contact form submissions.
-
Property Comments — See comments leads have left on listings and reply to them.
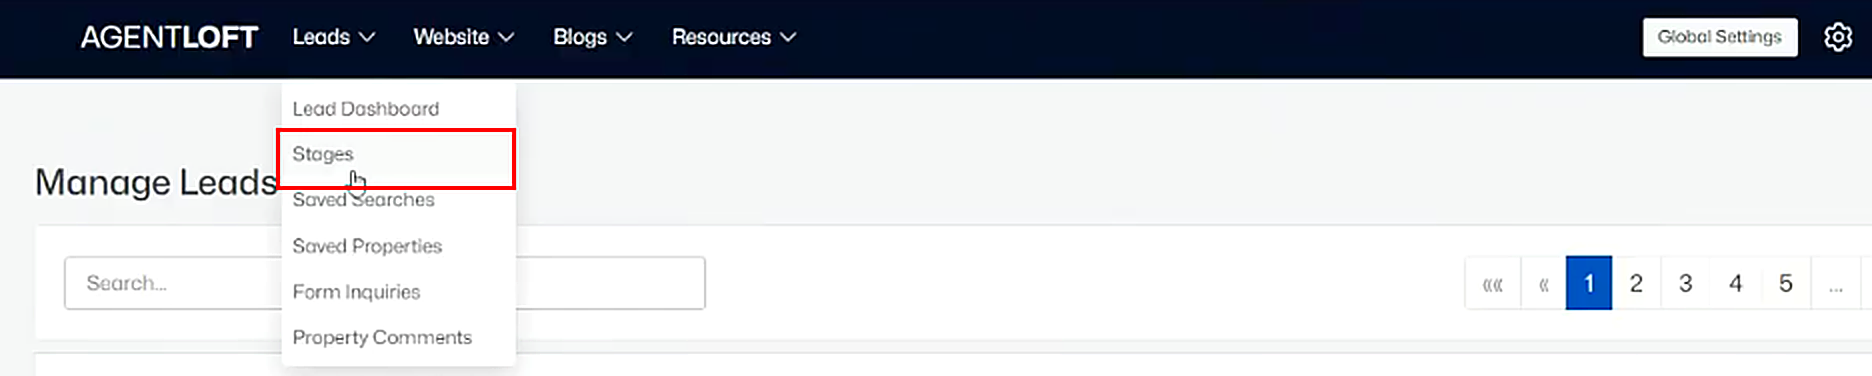
The Leads menu, with Stages highlighted
Note: What you can see and do here depends on your user permissions. Manage Leads and Manage Saved Searches are set per user under Settings (gear icon) > Users.
1. Lead Dashboard
The Lead Dashboard is where every new lead lands. It opens on the Manage Leads list.
Find and open a lead
Go to Leads > Lead Dashboard.
Type the lead's name in the Search box.
Click the lead's name, shown in blue, to open their record.
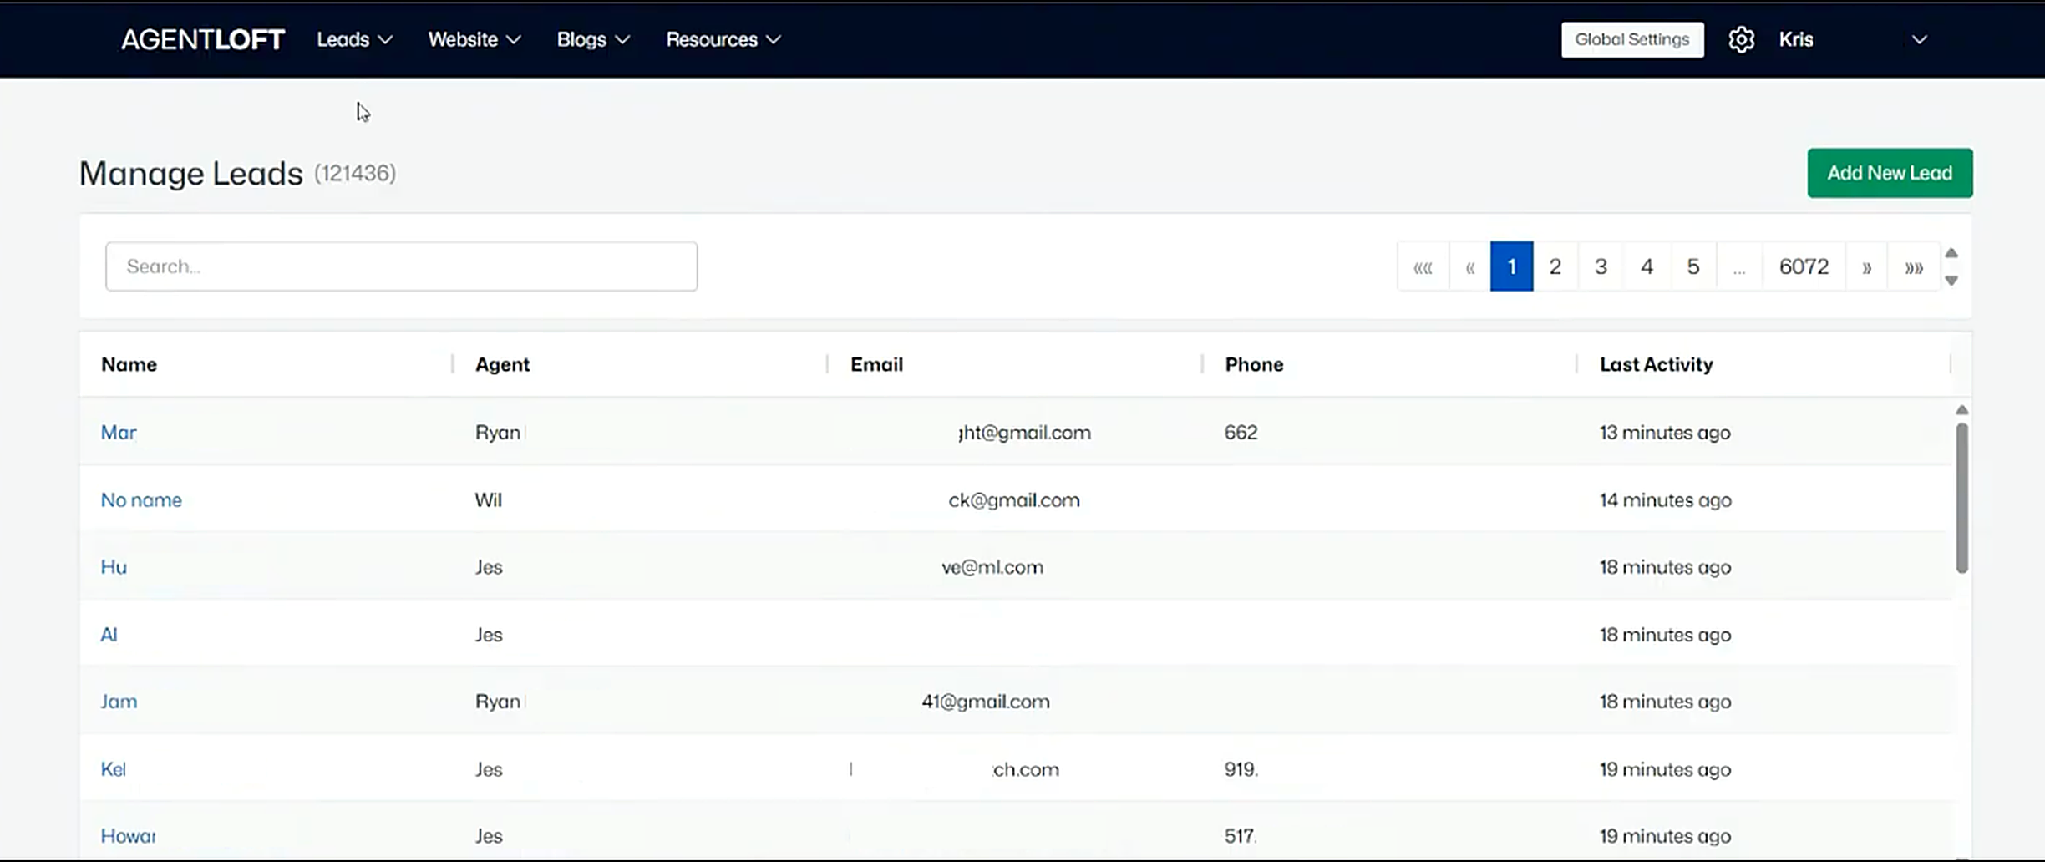
Manage Leads: name, assigned agent, email, phone, and last activity
What is on a lead record
A lead record has three areas:
Left: the lead's details, including assigned agent, stage, email, and phone, plus a Create Search button.
Center: an Add notes box, and tabs that count what the lead has done: Activities, Searches, Notes, Saved property, Form Inquiry, and Comments.
Right: Website Activities, a list of the pages the lead has viewed on your site.
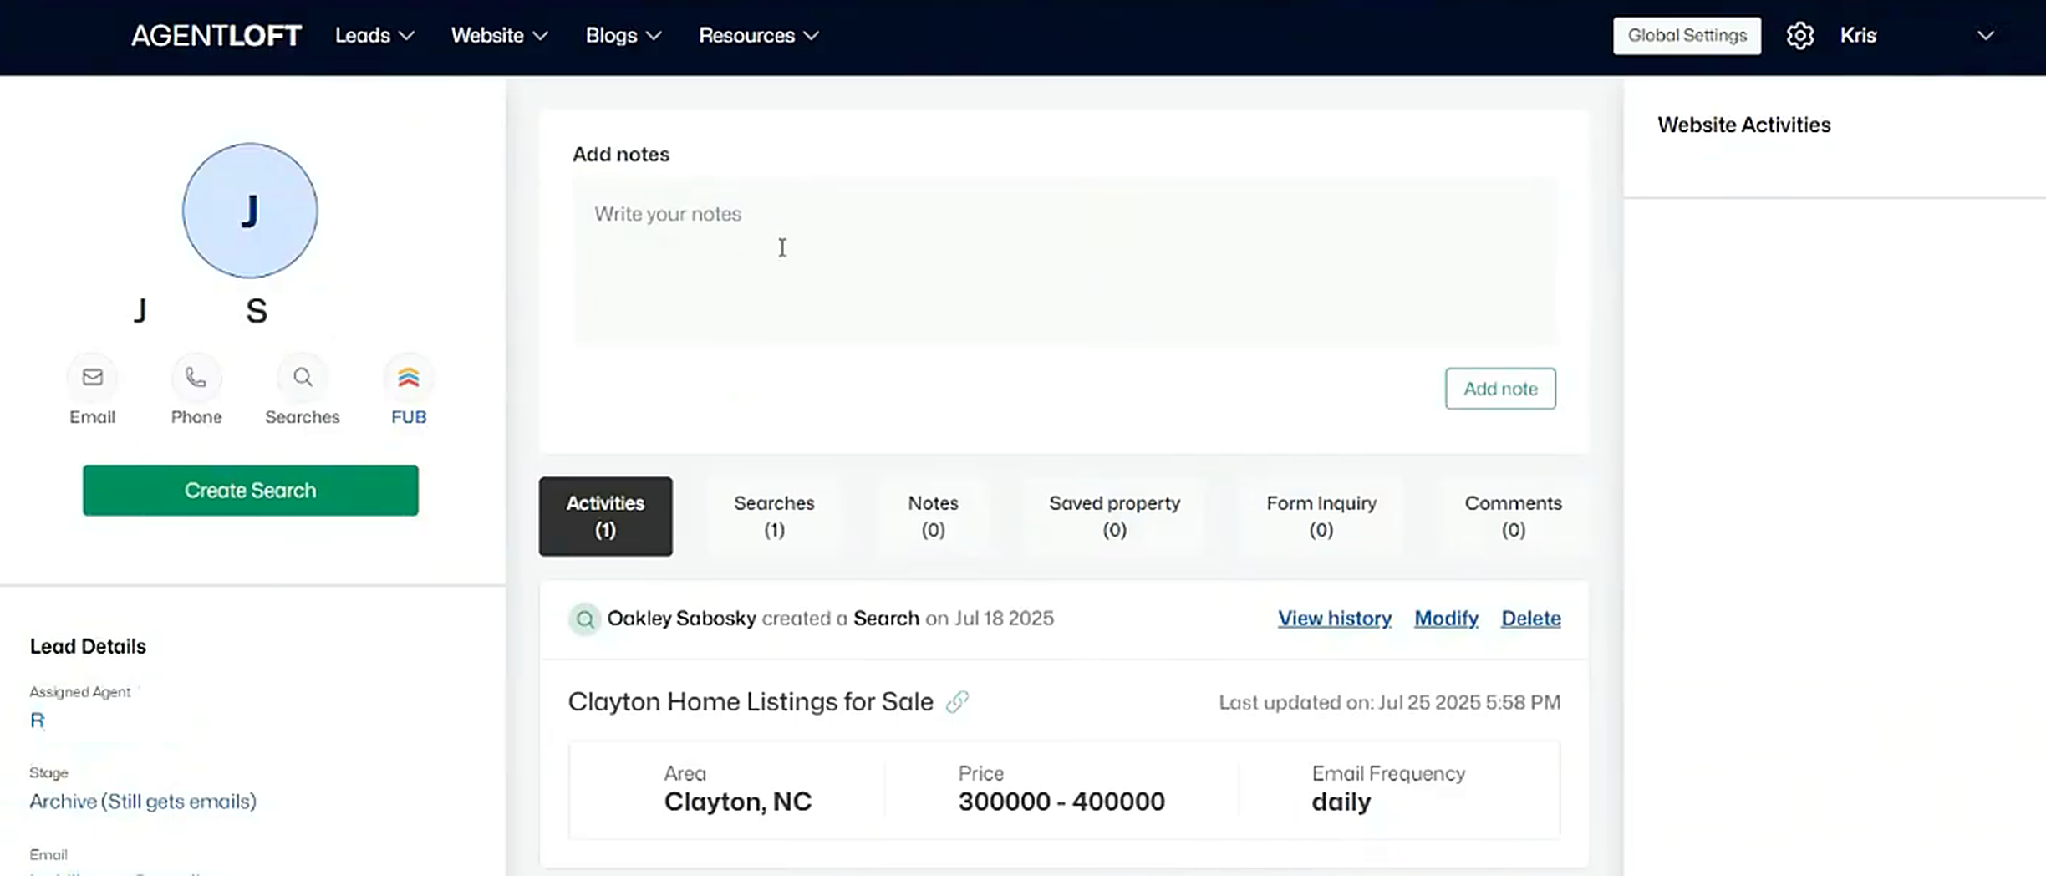
A lead record: details on the left, notes and activity tabs in the center
Tip: The number beside each tab tells you how much activity there is. A lead with no saved searches shows Searches (0) and an empty tab.
Create a saved search for a lead
A saved search emails the lead new listings that match the criteria you set.
Open the lead record and click Create Search.
Set the criteria in the sidebar. The filters are Locations, Status, Type, Foreclosures, Bedroom, Bathroom, and Price Range.
Click Save Search.
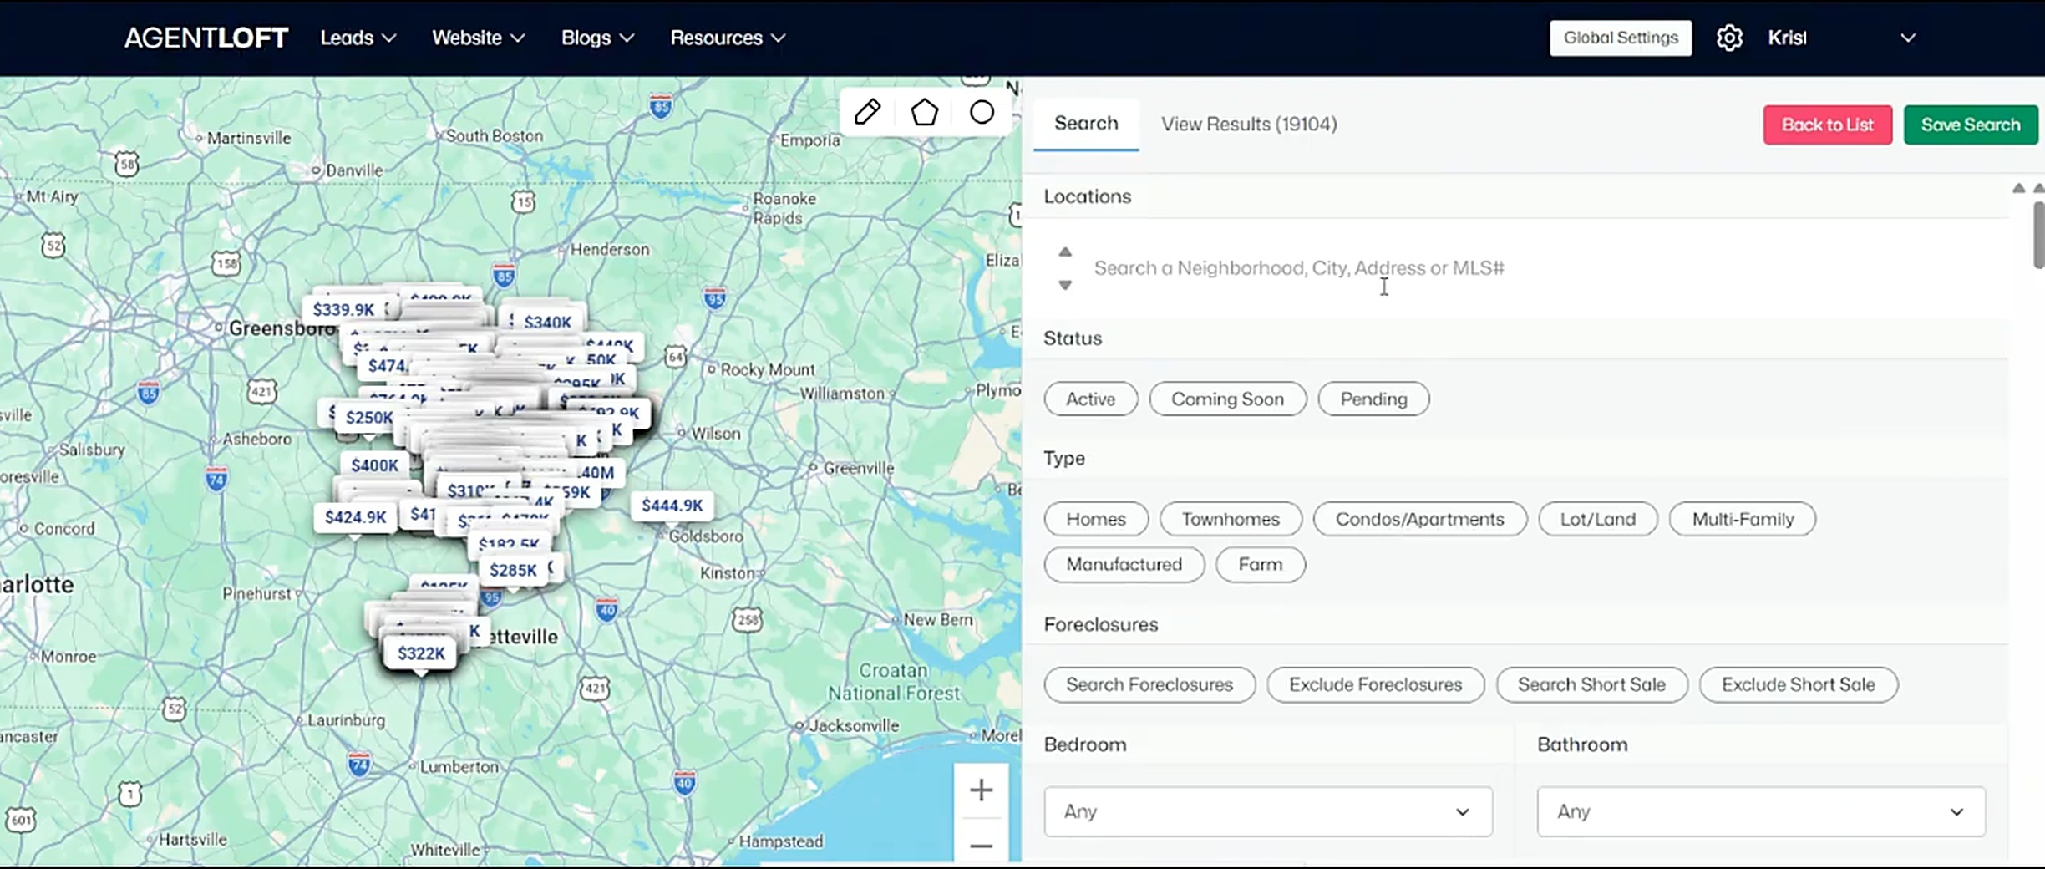
Create Search: the map on the left, the filters on the right
The search then appears under the Searches tab on the lead record, with its area, price range, and email frequency. From there you can View history, Modify, or Delete it.
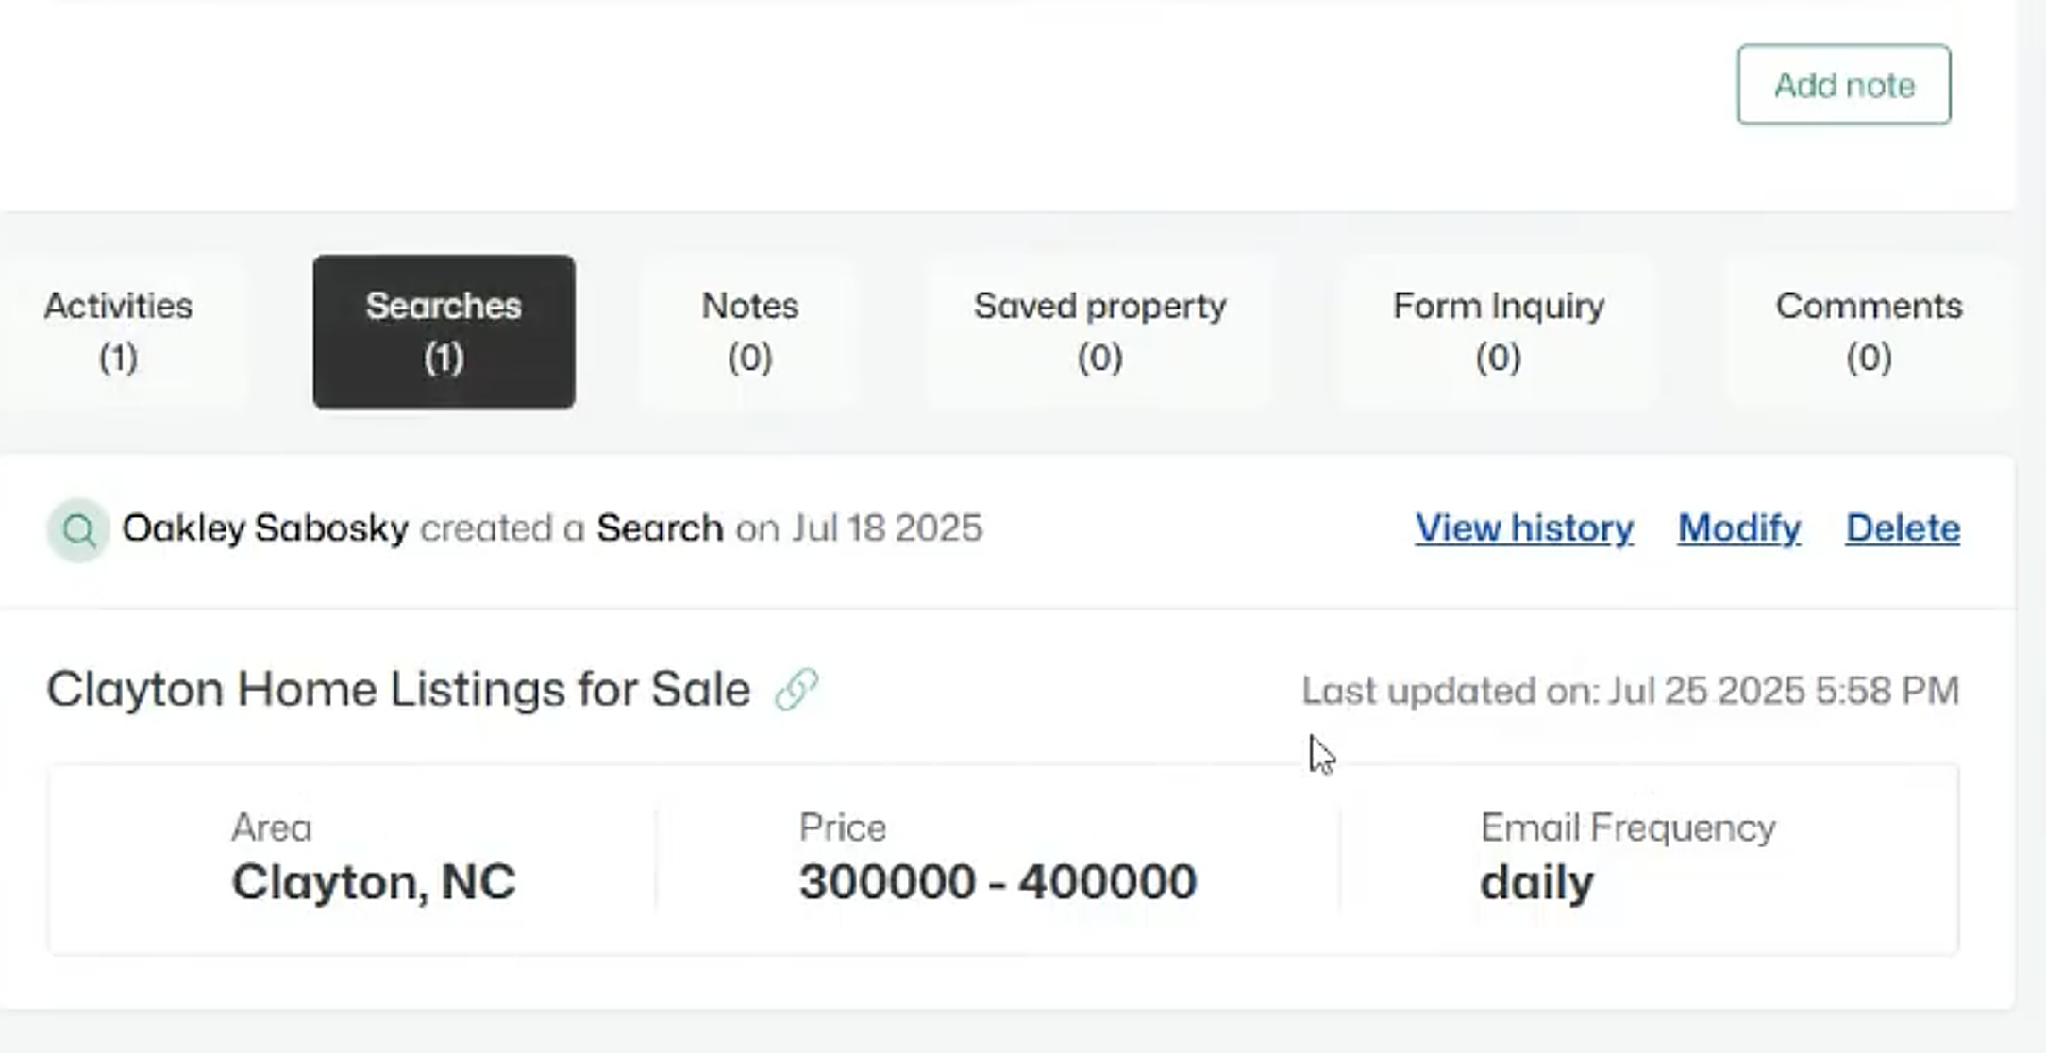
Searches tab on a lead record
2. Stages
Stages are the pipeline labels you assign to a lead, for example Lead, Active (Hot!) 0-3 Months, or Pending or List Agree. Signed. Every account sets up and names its own stages.
Review or edit a stage
Go to Leads > Stages to open Manage Stages.
Find the stage you want, using the Search box if the list is long.
Click the pencil icon in the Actions column to edit it.
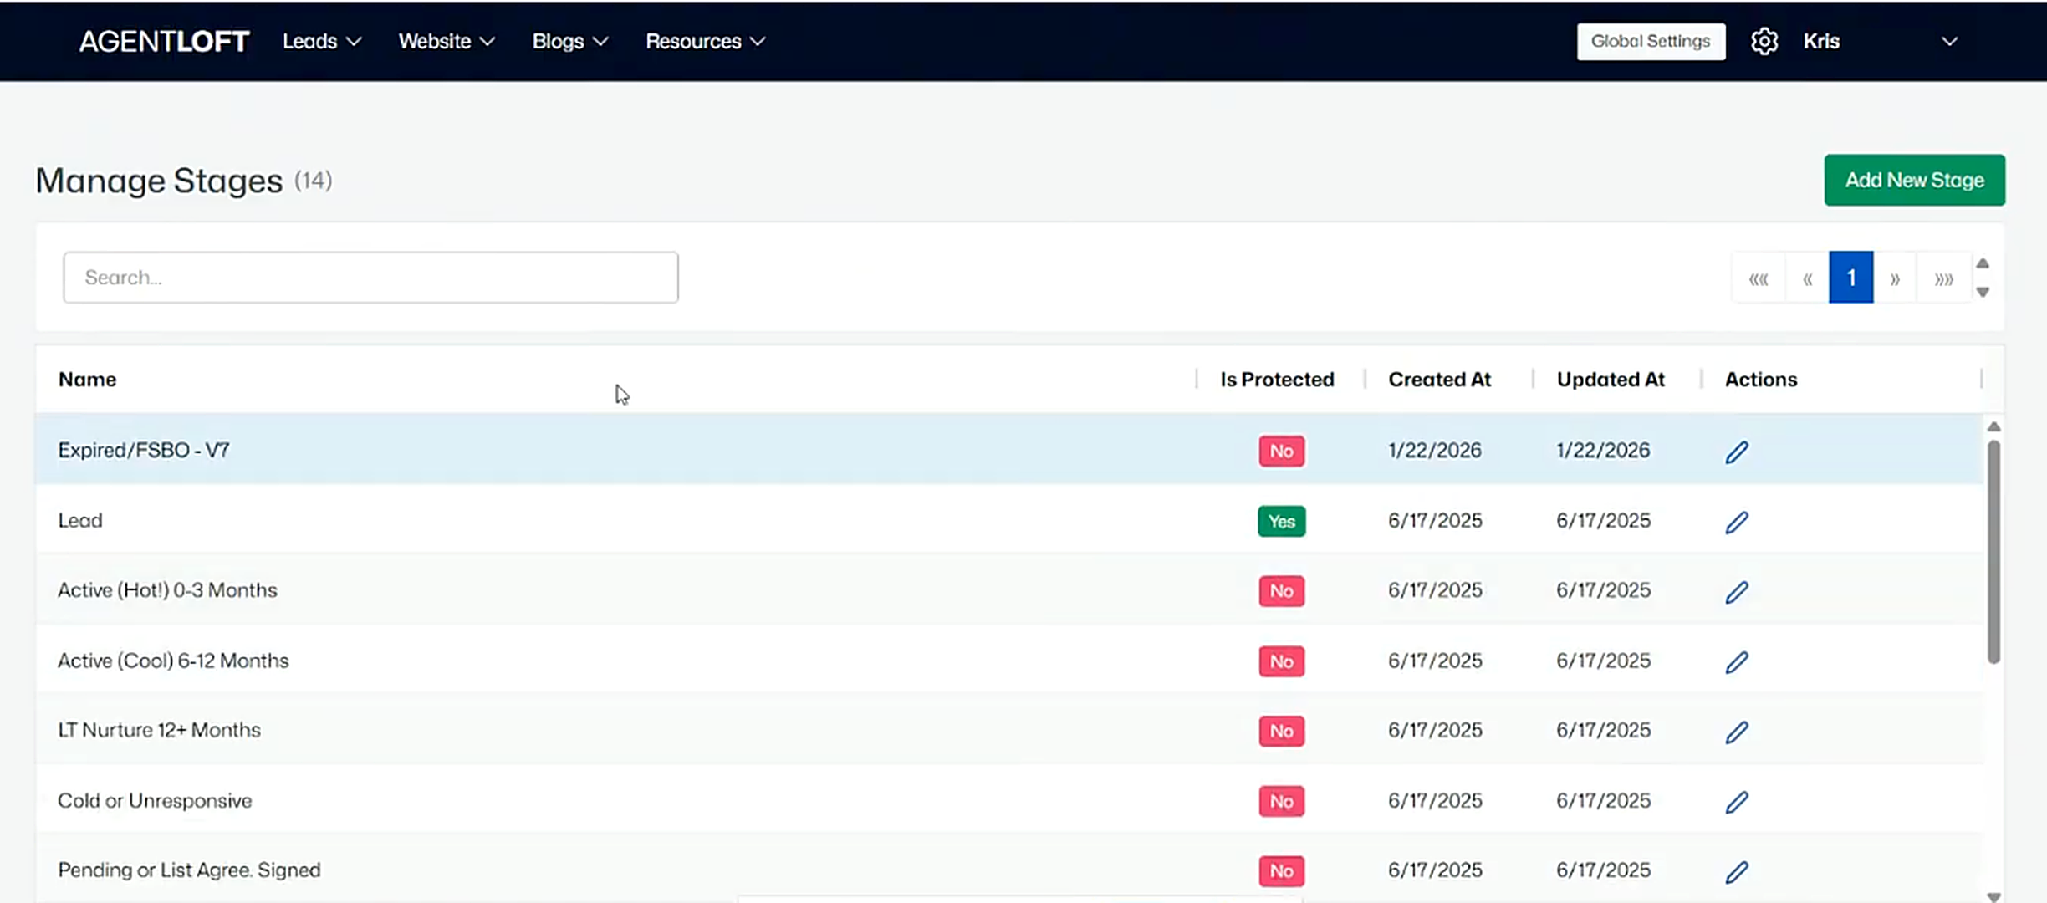
Manage Stages: every stage set up in the account
Add a stage
Click Add New Stage.
Type the stage Name.
Click Save.
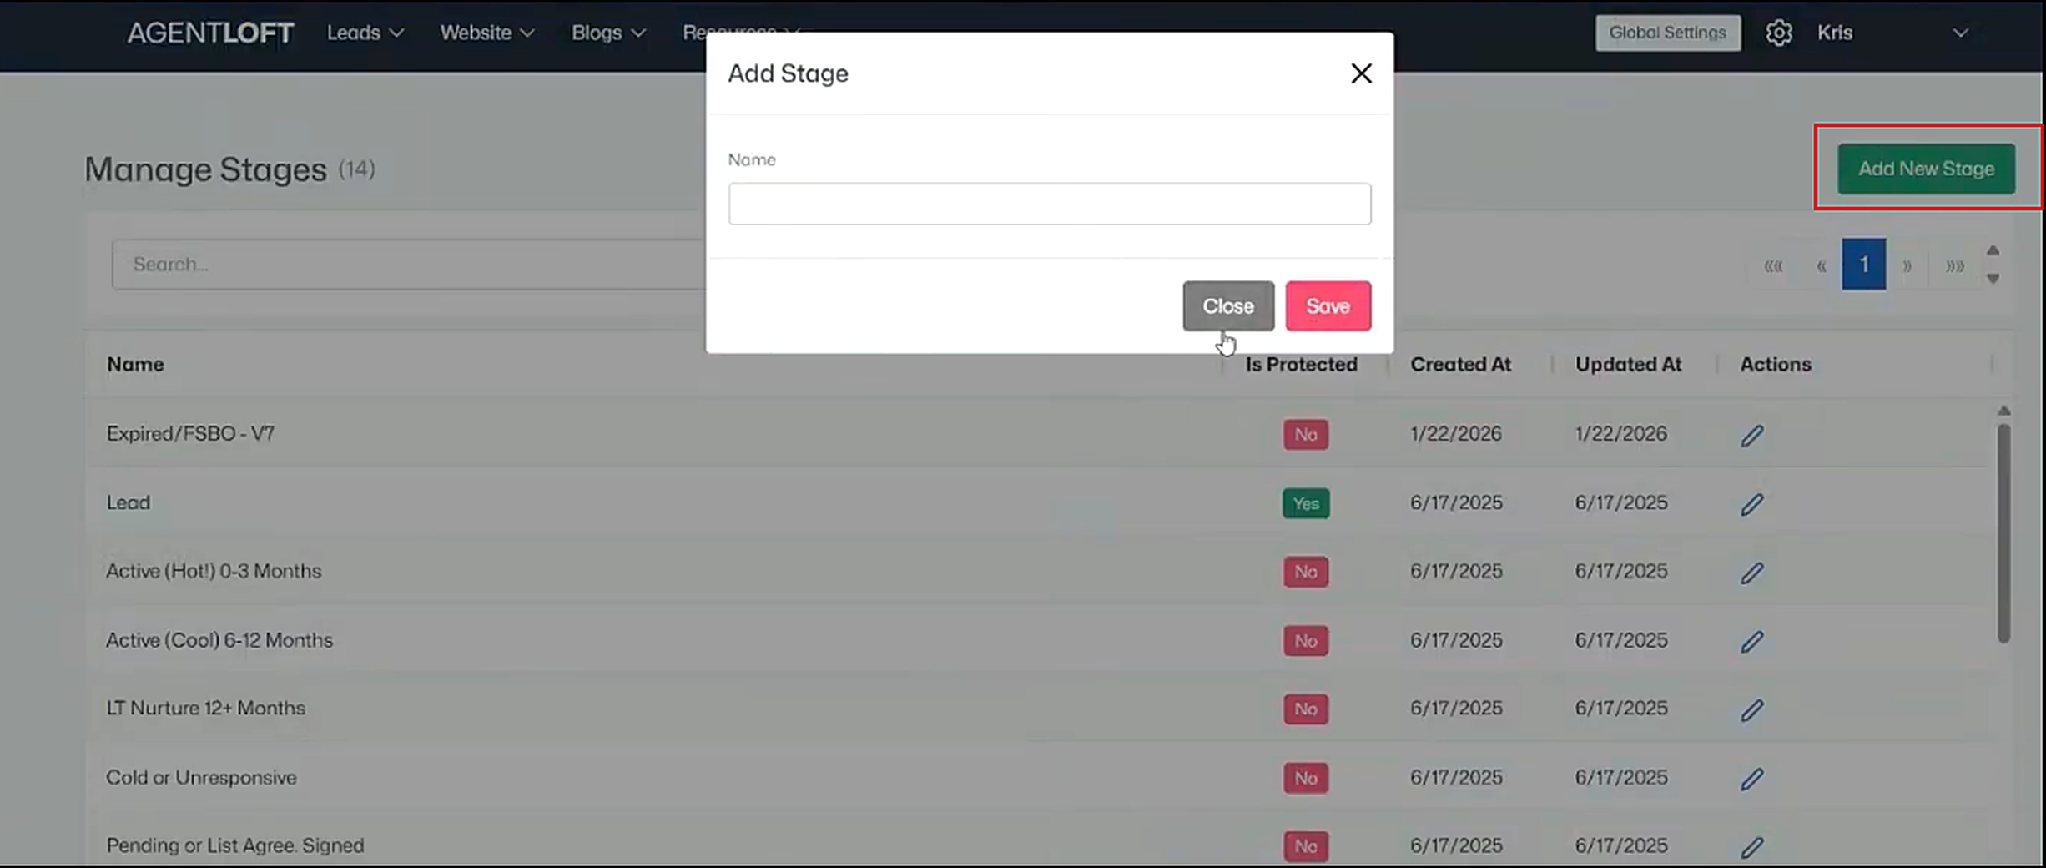
Add Stage: type the name, then save
Note: The stages shown above were set up for this account as an example. Name your stages to match the way you work your pipeline.
3. Saved Searches
Manage Client Searches lists every saved search in the account, across all leads. Each row shows the search title, the lead it belongs to, emails sent, and the created and updated dates.
Find and manage a search
Go to Leads > Saved Searches.
Find the search using Search by title or the Select Lead dropdown.
Use the icons in the Actions column to edit, copy, or delete the search.
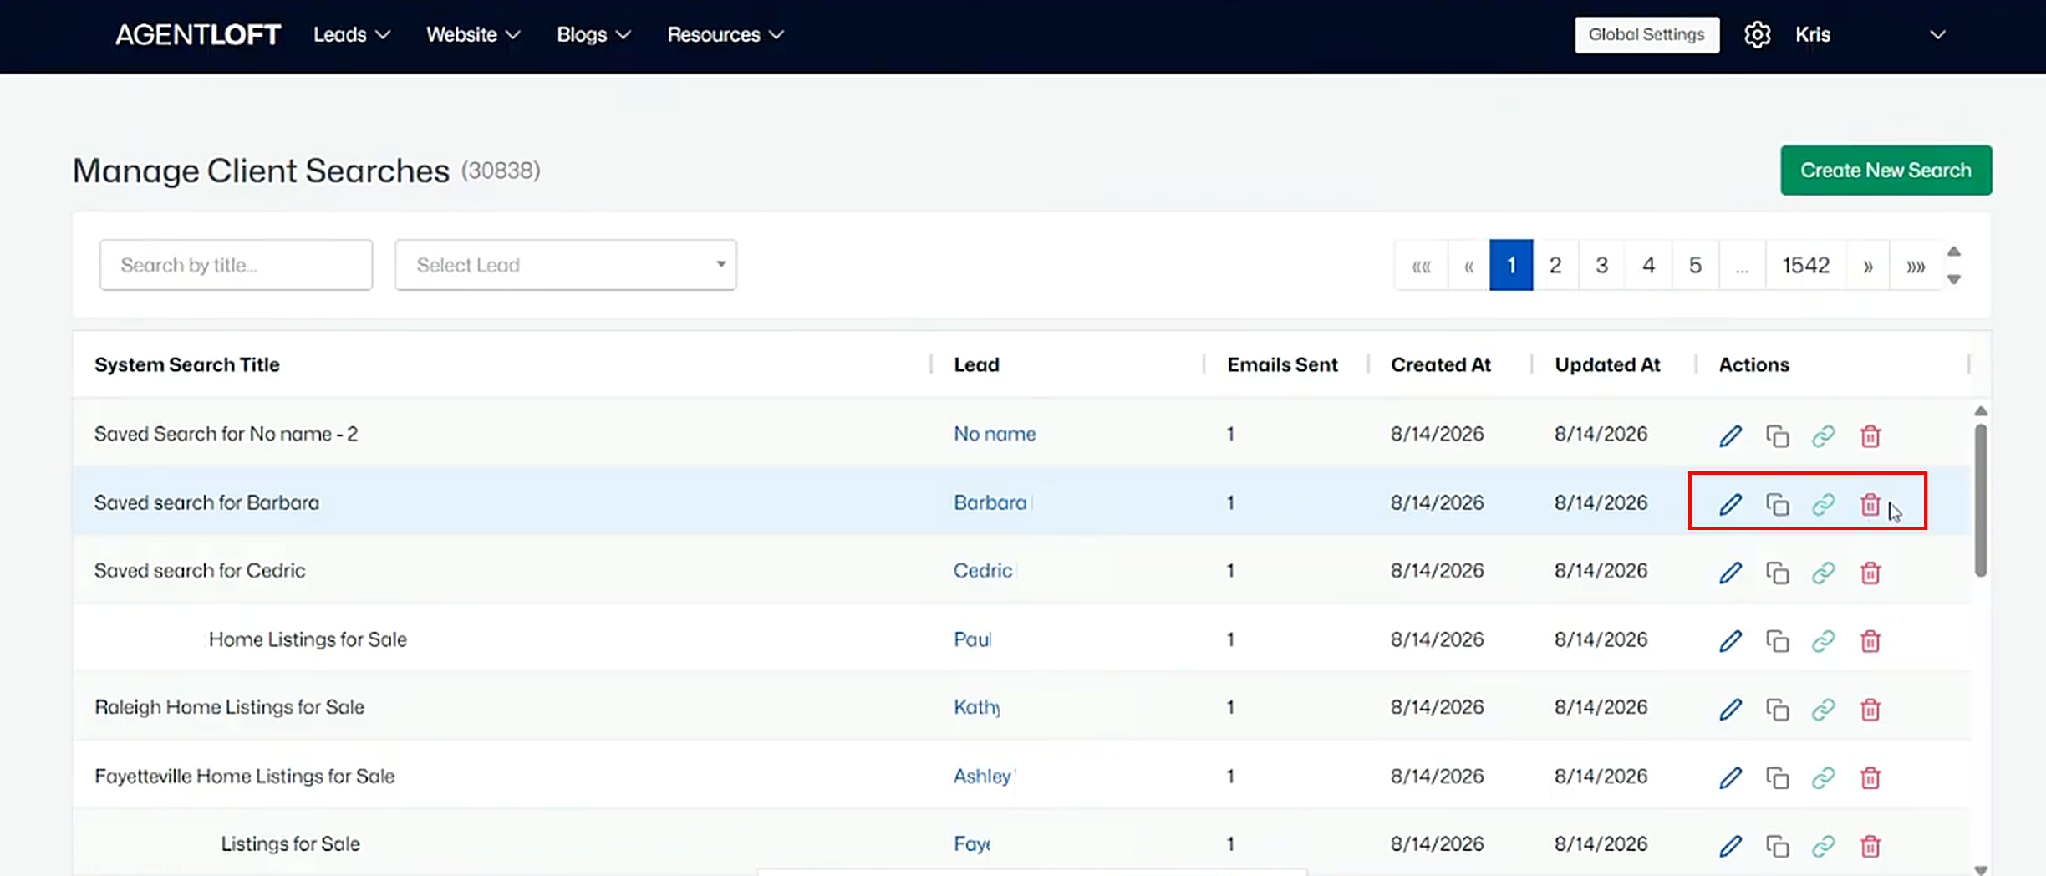
Manage Client Searches: every saved search in the account
Copying a search puts its link on your clipboard, so you can paste it into an email to the lead. Deleting a search stops those listing emails, which is useful once a lead has bought a home.
Draw a search area on the map
When a city or neighborhood filter is not precise enough, draw the area you want directly on the map.
Open the search, then click the pencil, polygon, or circle icon above the map.
Draw the area you want to cover. Locations updates to show Region in Map.
Click Save Search, or click Delete Shape to clear the area and start again.
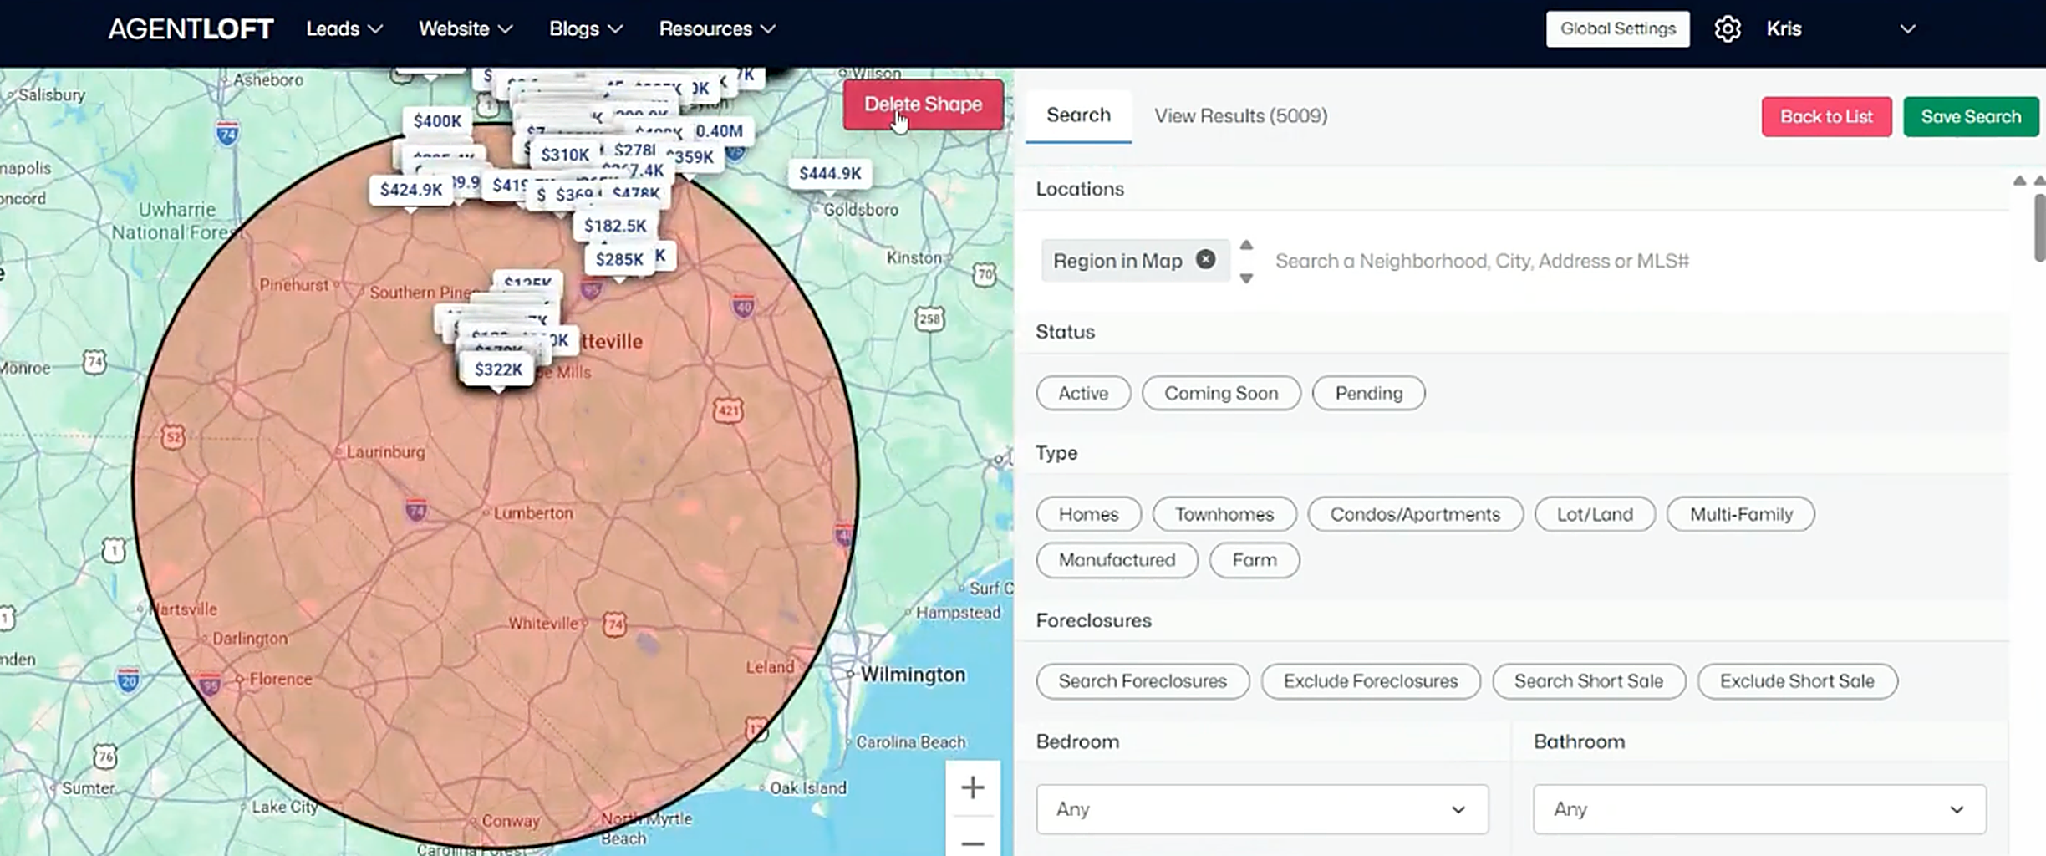
A circle drawn on the map, with Locations set to Region in Map
4. Saved Properties
Manage Saved Properties lists the properties leads have saved on your website, with the lead's name, the property address, its status, and the date it was saved.
Go to Leads > Saved Properties.
Use Select Lead to filter to one lead, or scroll the list by date.
Click the lead's name to open their record, or the property address to open that listing.
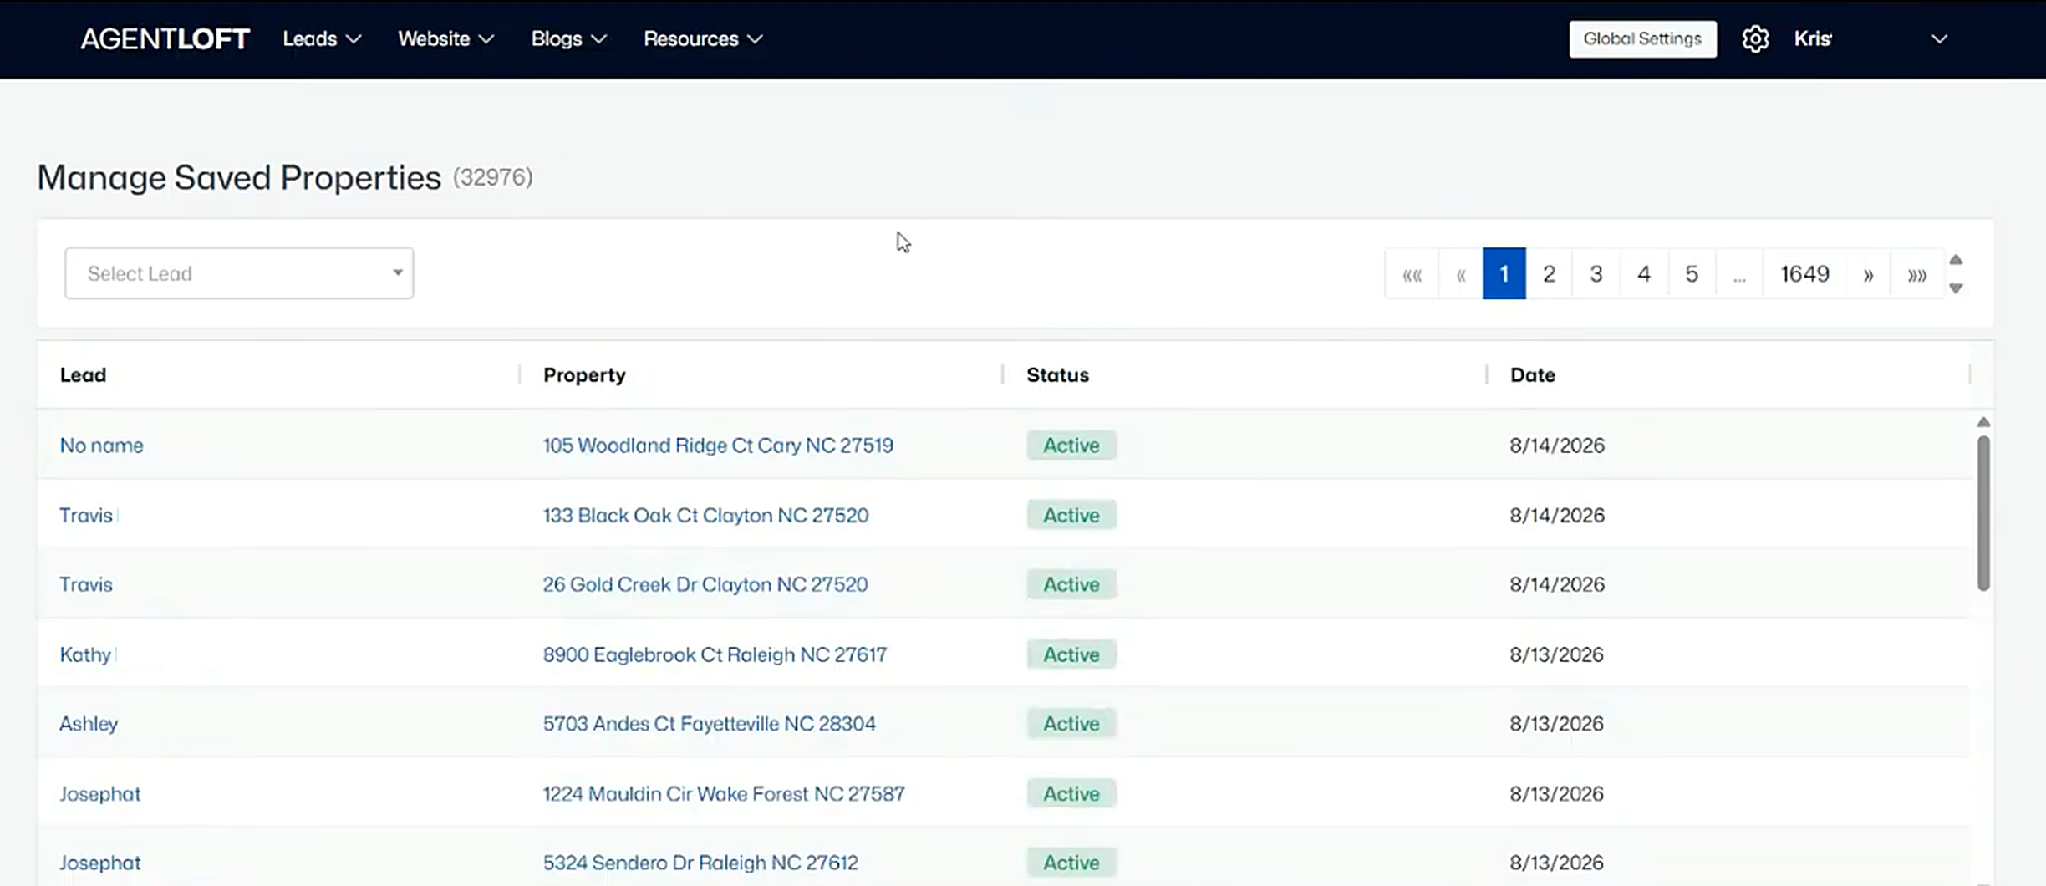
Manage Saved Properties: lead, property, status, and date
Tip: A lead who is saving several properties is a good one to follow up with. The Saved property tab on their record shows the full count.
5. Form Inquiries
Form Inquiries collects the forms visitors submit on your website. The Form Type column tells you what they asked for, for example Take A Tour, Request A Showing, or Basic Contact.
Go to Leads > Form Inquiries.
Use Select Lead to filter, or scroll the list by date.
Click View Details to read the full message, or click the lead's name to open their record.
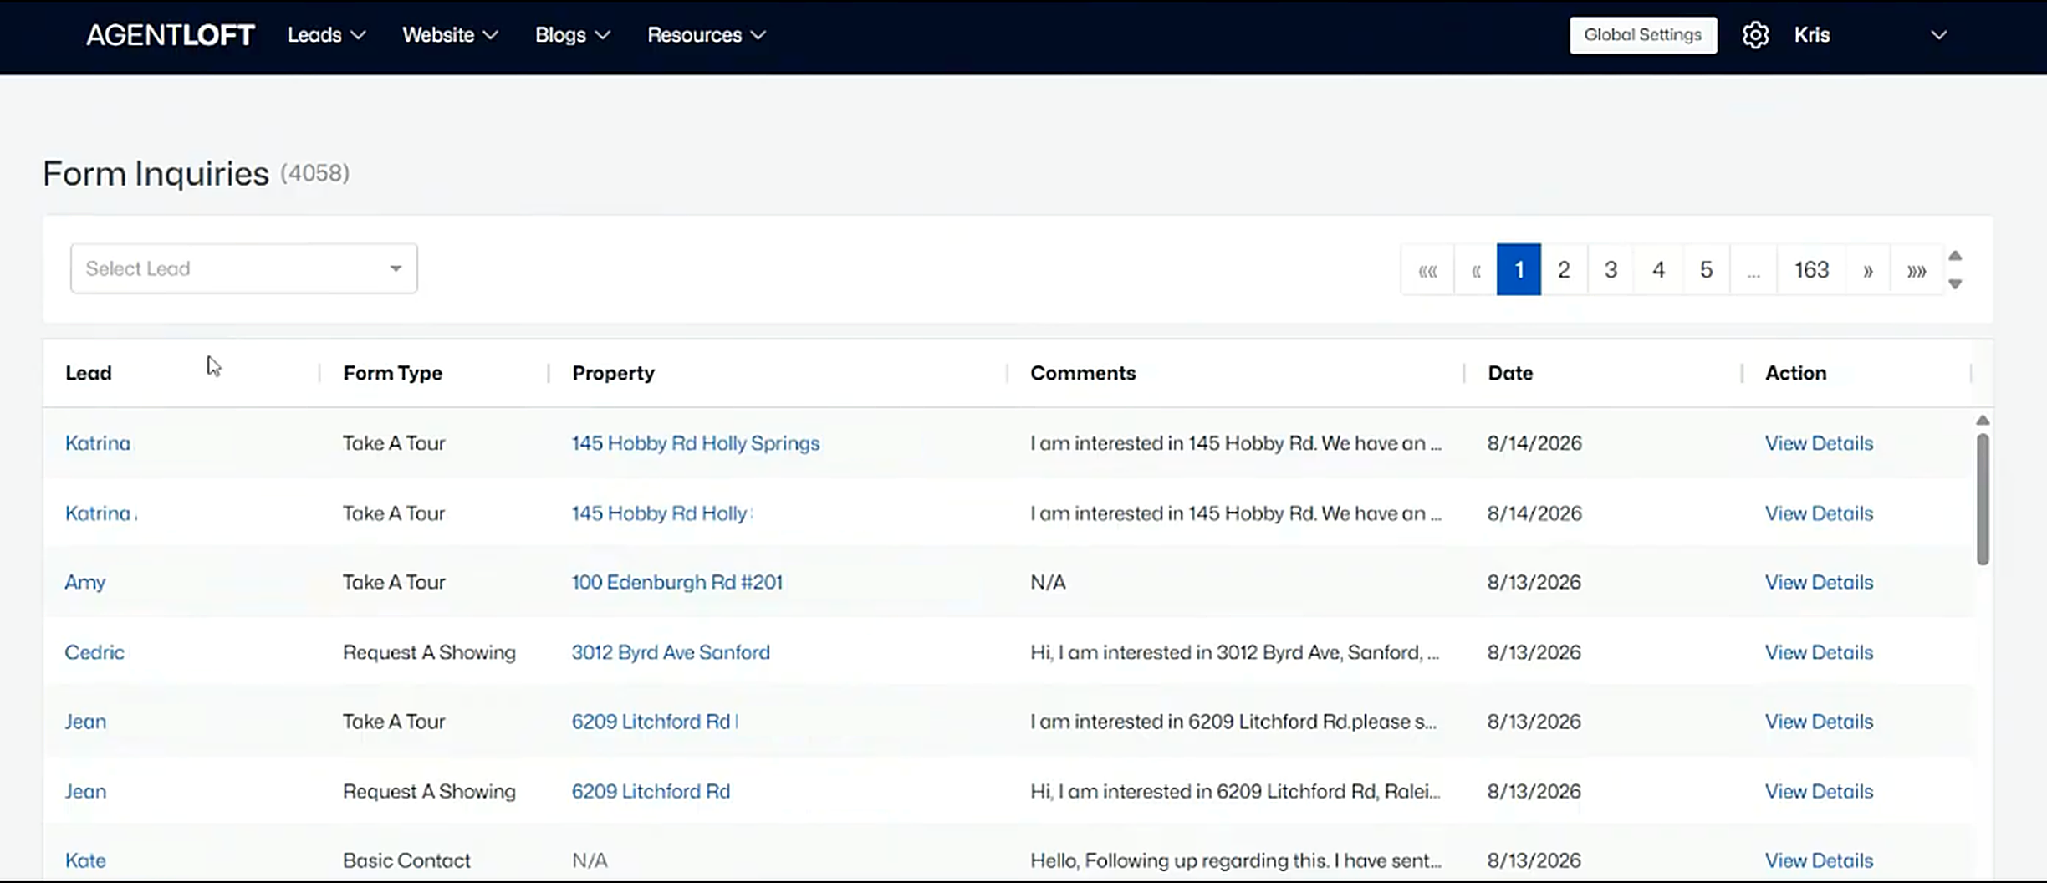
Form Inquiries: lead, form type, property, comment, and date
The same inquiry appears under the Form Inquiry tab on the lead record, with the property and the full message.
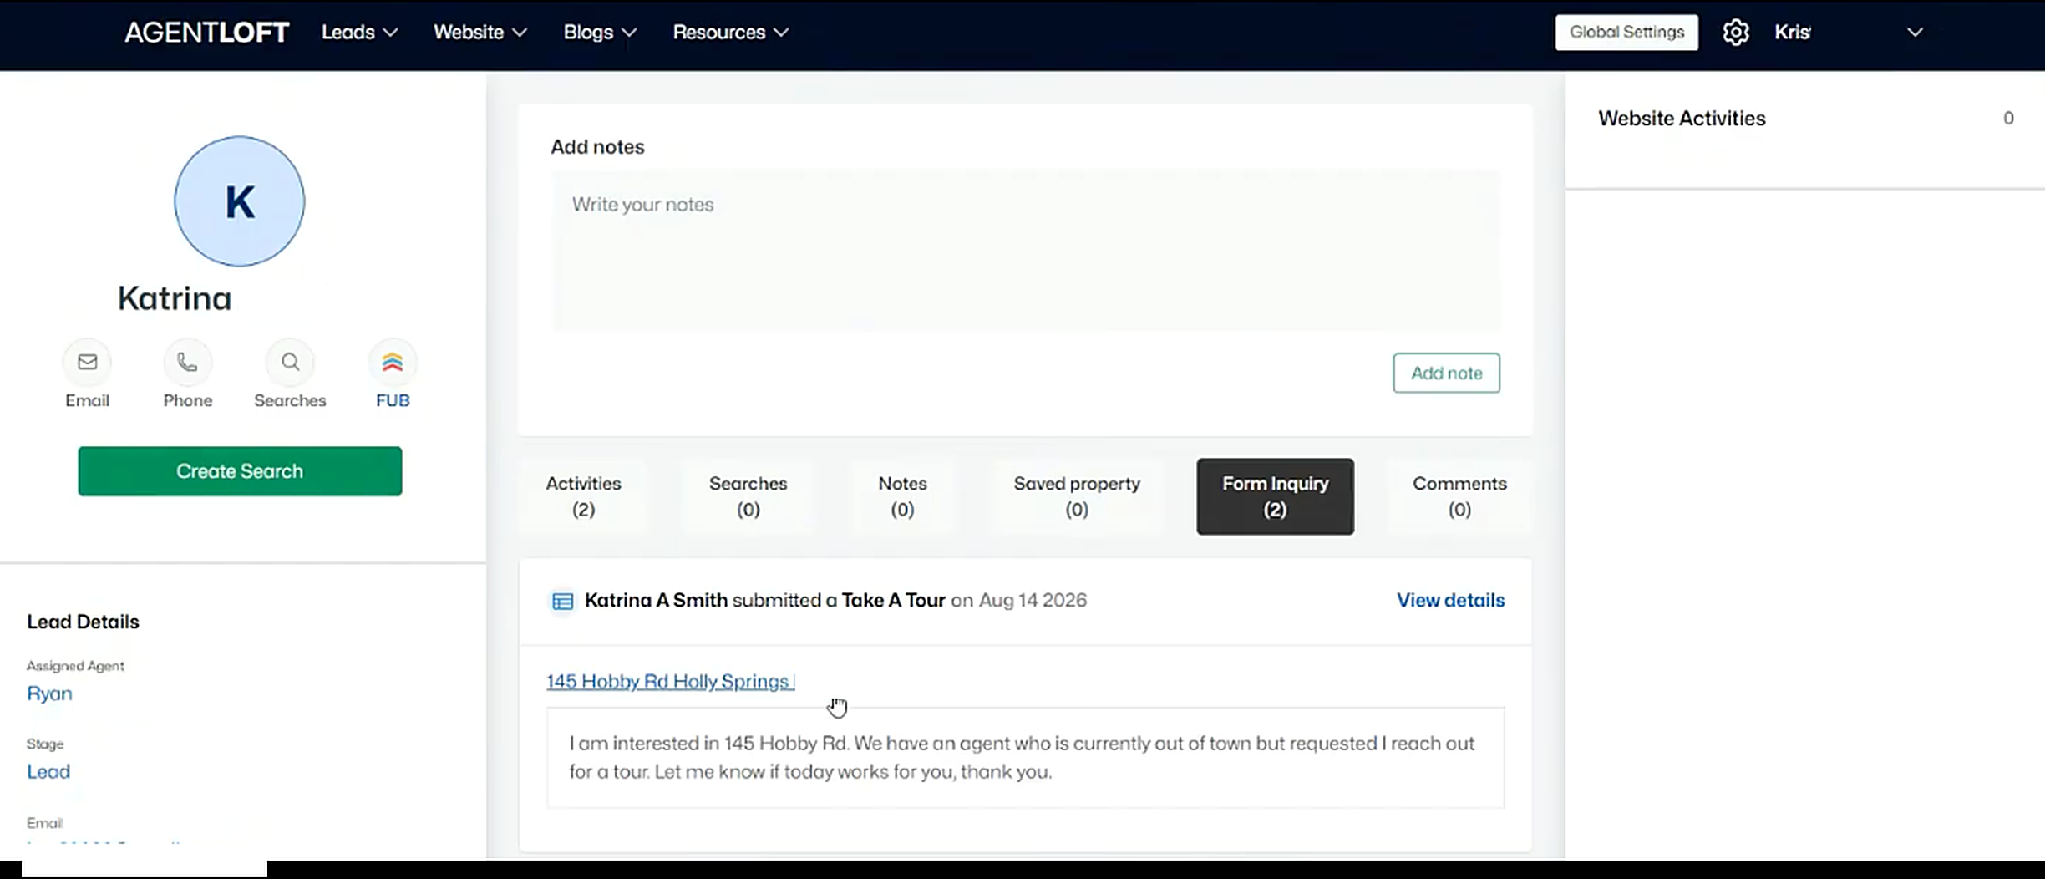
Lead record: the Form Inquiry tab
Note: These inquiries come from the Request a Tour and Contact Agent buttons on a property page. When a visitor fills in that form, the inquiry appears here.
6. Property Comments
Manage Property Comments shows the comments visitors have left on listings, with the lead's name, the property, the latest comment, and the date.
Go to Leads > Property Comments.
Use Select Lead to filter to one lead.
Click Reply in the Action column to respond.
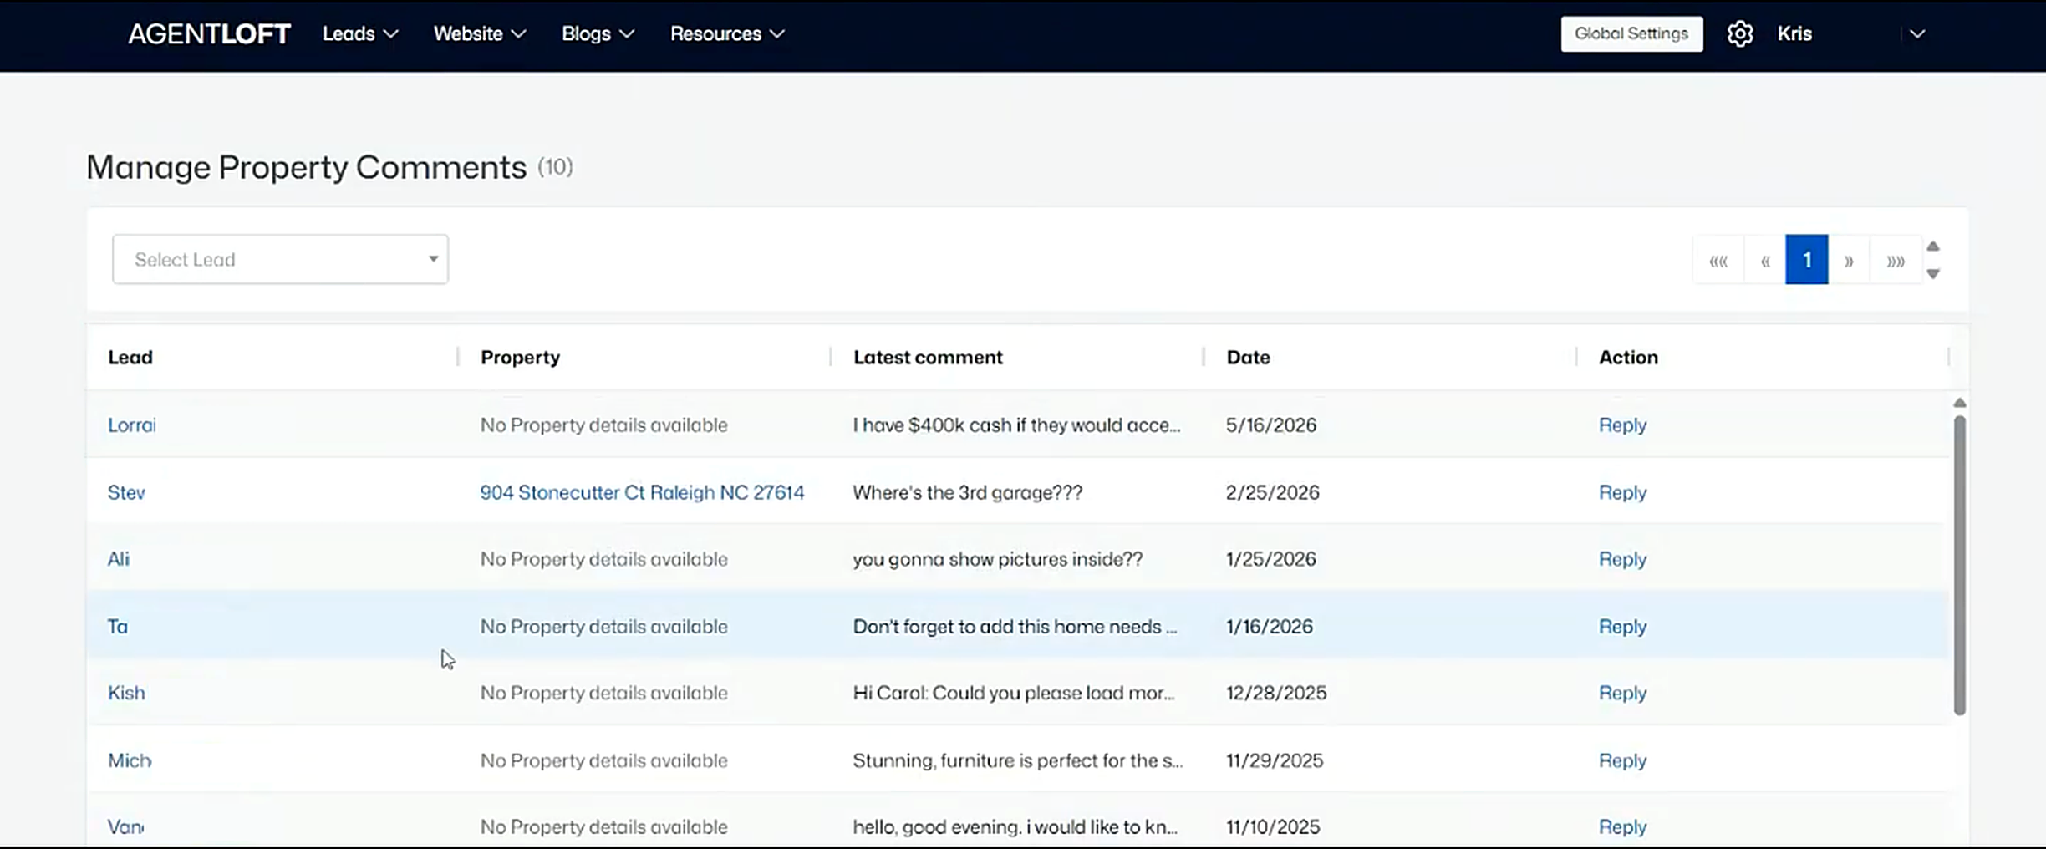
Manage Property Comments: lead, property, latest comment, and date
Comments also appear under the Comments tab on the lead record, alongside everything else that lead has done.
Tip: A comment is an easy opening for a conversation. If someone asks for more photos or details, replying gives you a reason to reach out, even when the listing is not yours.
Need help? Email support@agentloft.com.